
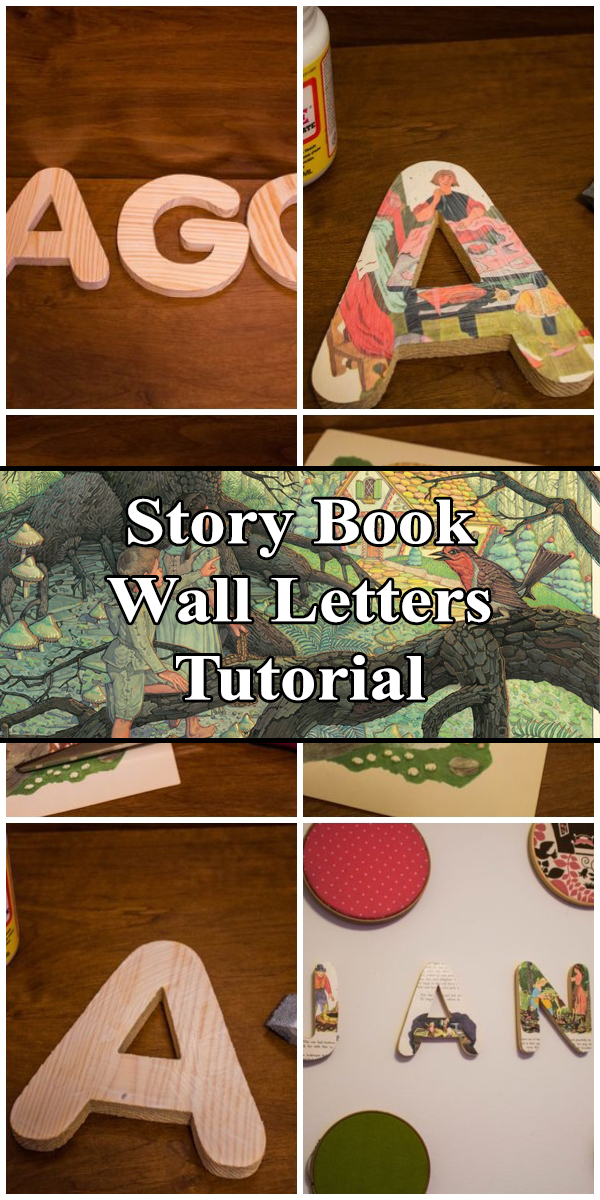
If your child has a particular story book that they really like, here’s a fun way to turn that very story into a personalized decoration for their bedroom wall. Classic books work the best for this in our opinion, such as Winnie the Pooh, Peter Pan, or as used in this tutorial, Grimm’s Fairy Tales. However, you can really use whatever book you’d like, and it doesn’t even need to have pictures. For instance, if you’re of the Christian faith, you could use pages from the Bible (with your favorite verses on them) and put them on letters that spell “Jesus”. Using your own name is only one way to do this – the possibilities are truly endless!
Also, don’t feel bad about destroying a book for art’s sake – many a book have suffered a much worse fate than this, and you can always get another one!
Step 1: Get Some Wooden Letters
You can find unfinished wooden letters at almost any craft store. These letters were purchased at Walmart. If you have the means you could cut the letters out of wood yourself, but it’s way easier just to buy them.

Step 2: Acquire an Old Book
Choose an old storybook from a thrift store or yard sale that you wouldn’t mind cutting up. You can also use scrapbooking paper that matches the theme of your child’s room. Maggie and Jane’s room is decorated in a vintage fairy tale theme so an old illustrated copy of Grimm’s Fairy Tales was chosen for their letters.

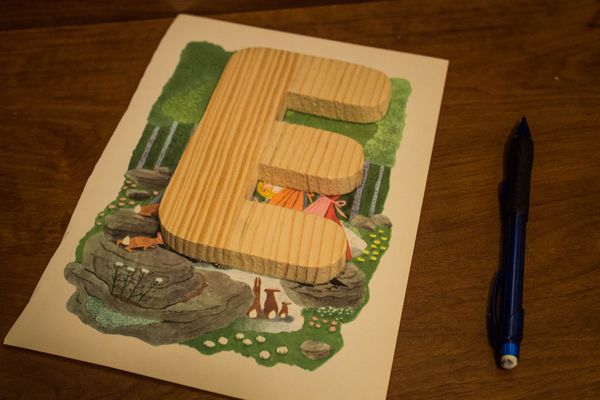
Step 3: Choose Your Pages
Decide which letter would best fit each picture chosen. You want to make sure you get somewhat of a comprehensive image once the letter is cut out. Then trace the letter onto each page.
Step 4: Time to Cut
Cut out all of the letters. Be sure to cut on the inside of the line drawn so that there is not overhang on the edge of the letter.

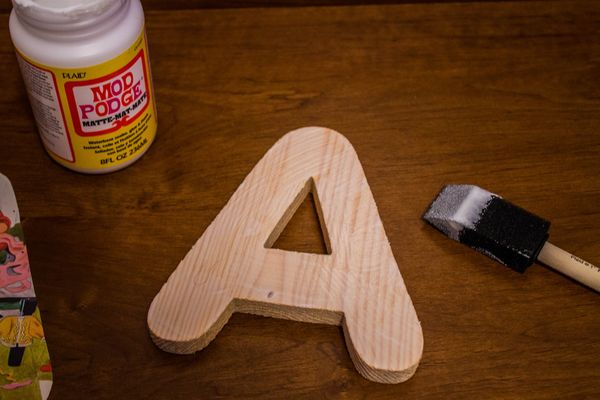
Step 5: Apply Modge Podge
Paint a coat of Mod Podge onto your wooden letter. You could just use regular glue, but we’ll use Modge Podge later on to give the letters a nice glossy finish.
Step 6: Add the Picture
Place the picture you’ve cut out onto the letter and then paint another coat of modge podge over the paper.

Step 7: Hang ’em High
Hang the name(s) on the wall or door once dry.
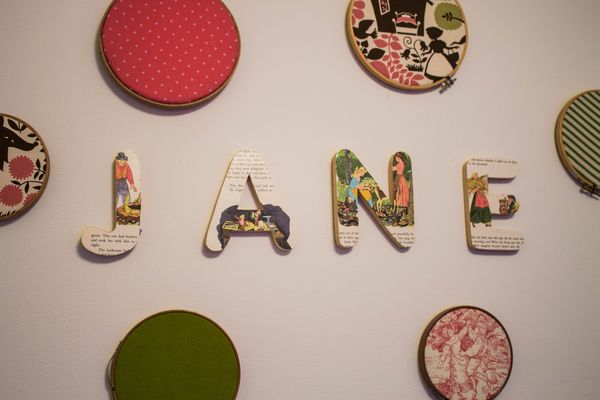
Be careful when you make these – once you’ve made a few and seen how awesome they look, you might not be able to stop and you’ll end up with walls completely covered in story book letters. Oh, who am I kidding? That would be awesome!